
Eye Drawing Tutorial step by step easy for Beginners
How to draw an Eye Step by Step for Beginners – Easy Guide
Welcome to the eye drawing tutorial! Drawing an eye is a fun way to improve your art skills. In this guide, you’ll learn simple steps to draw an eye from start to finish. We’ll cover materials you need, basic shapes, and how to add details like eyelashes and shading. Follow along, and you’ll create a beautiful eye drawing in no time!
Before you start drawing, make sure you have all the necessary materials, such as paper, a pencil, an eraser, and optional colored pencils or markers for adding color later.
This is a very simple step by step eye drawing tutorial for beginners.
Materials required for Drawing an Eye :
Materials You Need:
Paper
Pencil (an HB pencil for basic shapes and a 2B pencil for details)
Eraser
STEP 1 : Draw Basic Circles
Start by drawing two circles. Draw one smaller circle in the middle of a larger circle. The smaller circle will be the pupil, and the larger circle will be the iris. This gives you the basic shape of the eye.

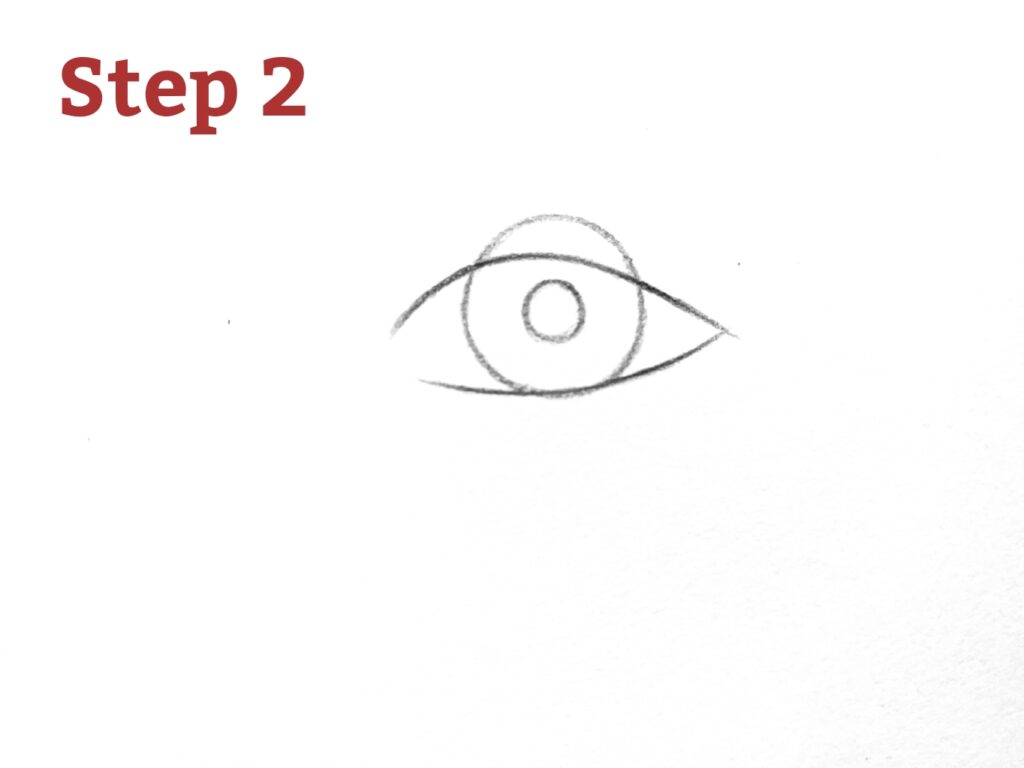
STEP 2 : Add Eyelid Lines
Next, draw the top and bottom eyelid lines. Above and below the circle, draw two curved lines. These lines create the top and bottom parts of the eyelid. The top line should be slightly thicker than the bottom one.
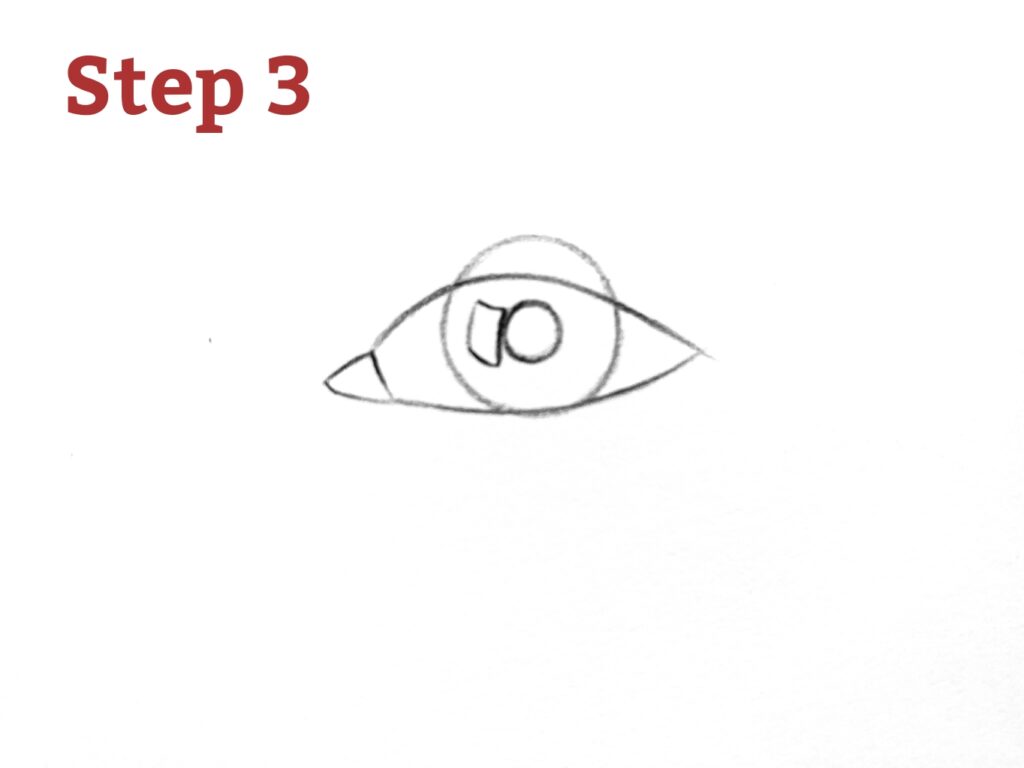
STEP 3 : Connect Eyelids and Add Light Spot
Now, draw a line that connects the top and bottom eyelid lines, following the curve of the eye. Add a small spot near the pupil. This spot represents reflected light, making the eye look shiny and realistic.
STEP 4 : Darken the Pupil
Draw the line above the upper eyelid and the line under the lower eyelid as shown in the image. Now use 2B or 4B pencil to darken the pupil. Fill in the pupil properly to achieve the darkest shade. Darken the pupil to make it stand out against the iris.

STEP 5 : Fill in the Iris
Next, use a 4B or 2B pencil to shade the iris. Keep your pencil strokes soft and even. Remember to leave the spot for the light reflection as you fill in the iris with color.

STEP 6 : Add Eyelashes
Its time to add the lashes by using 2B or HB pencil. Draw the lashes using outer lines of the lid. Make them longer towards the outer edge of the eye. For the lower eyelid, draw shorter eyelashes. Keep your strokes light and lift your pencil swiftly at the end to get better results.

Final Touches
Your eye drawing is now ready! With practice, you can improve your skills and make your eye drawings look even more realistic. Keep drawing and experimenting to get better at capturing the details of the eye.
Q: What materials do I need to draw an eye?
A: You need paper, a pencil (HB for basic shapes, 2B or 4B for details), an eraser, and optional colored pencils or markers for adding color.
Q: How do I draw the basic shape of the eye?
A: Start by drawing two circles, one inside the other. The inner circle is for the pupil, and the outer circle is for the iris. Add the eyelid lines above and below the circle.
Q: What are common mistakes when drawing an eye?
A: Common mistakes include uneven eyelid lines, incorrect pupil placement, and not shading the iris properly. Make sure to follow the steps carefully and use visual aids.
Q: How can I add more details and shading to make my eye drawing look more lifelike?
A: Use a softer pencil (2B or 4B) to add shading and create gradients. Pay attention to light reflection spots and the texture of eyelashes for a realistic effect.
What are some tips for continued improvement in drawing?
To keep getting better at drawing, practice regularly and try different techniques. Study how real eyes look and use references like photos. Don’t be afraid to make mistakes—each one helps you learn. Also, ask for feedback from friends or online communities. Keep challenging yourself with new drawing exercises and remember, the more you draw, the better you’ll get!