
Watercolor Painting
You need to gather some things to start painting with watercolors. Here’s a list of what you will need:
1.Watercolor paper: This is a special kind of paper made for watercolor painting.
2.Brushes: You’ll need two brushes, one small and one medium-sized, to paint with.
3.Watercolor paints: These are special paints that can be mixed with water to create beautiful colors.
4.Palette: It’s a flat surface where you can put and mix your paints.
5.Cup of water: You’ll need this to clean your brushes and also to mix with the paints to create different shades.
Once you have all these things ready, you can start your watercolor painting adventure!
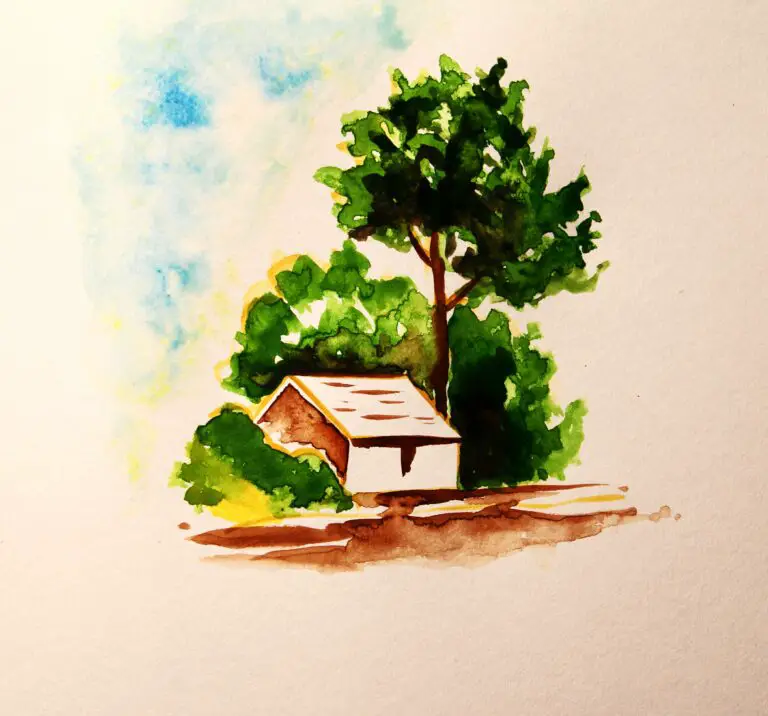
Sketching the Scene:
To start painting your watercolor scenery, begin by lightly sketching the hut and the tree shapes on your watercolor paper. For the hut, draw a long box-like shape, similar to a rectangle. For the tree, make a shape like a pointed mountain, which is a triangle. These basic outlines will be the starting point for your hut and tree. A gentle sketch will allow you to paint over them easily later on. Once the outlines are ready, you can continue with the next steps to create a beautiful watercolor scene.
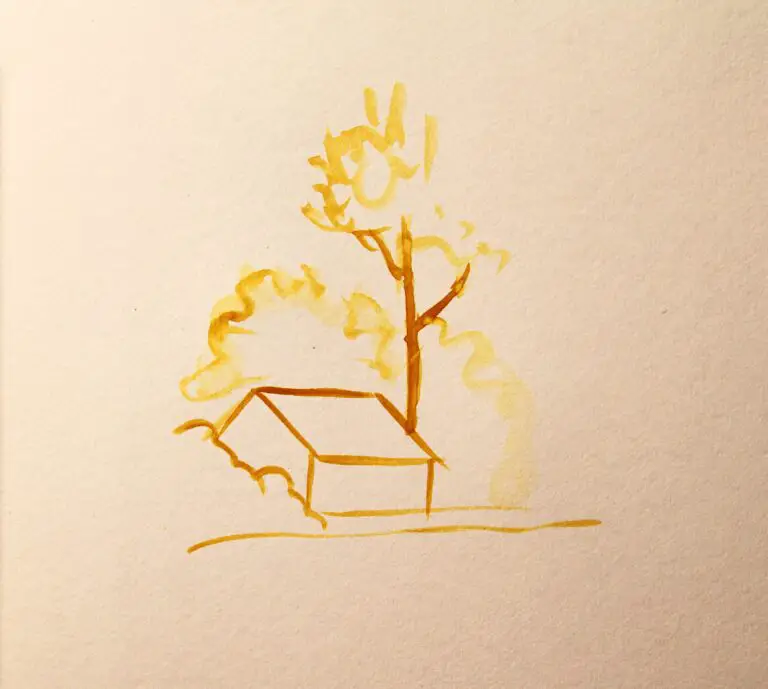
Painting the Tree:
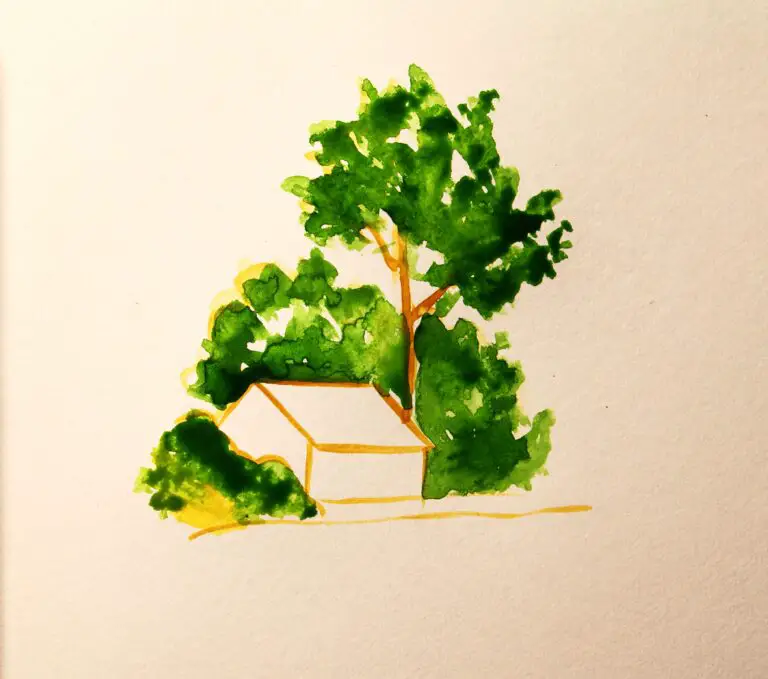
To paint the tree, start by wetting the part of the paper where the tree will be using your brush and clean water. This helps the paint to spread nicely. Next, choose a green color from your watercolor paints. Use this green color to paint the tree’s foliage, which is the leaves and branches. Make small and gentle strokes with your brush to create the foliage texture. Remember to leave some spaces without paint to show the gaps between the leaves. These gaps will represent the leaves’ spaces and make the tree look more natural.

Once the green paint for the tree’s foliage has dried, it’s time to add the trunk and branches. Choose a darker color like brown or black from your watercolor palette. Using this darker color, carefully paint thin lines to create the appearance of a tree trunk and branches. Imagine the trunk as the main body of the tree, and the branches as smaller lines extending from it. Try to make the lines look natural and not too straight. Take your time and use a steady hand to create the illusion of a tree with its trunk and branches. This will add depth and detail to your watercolor scenery.
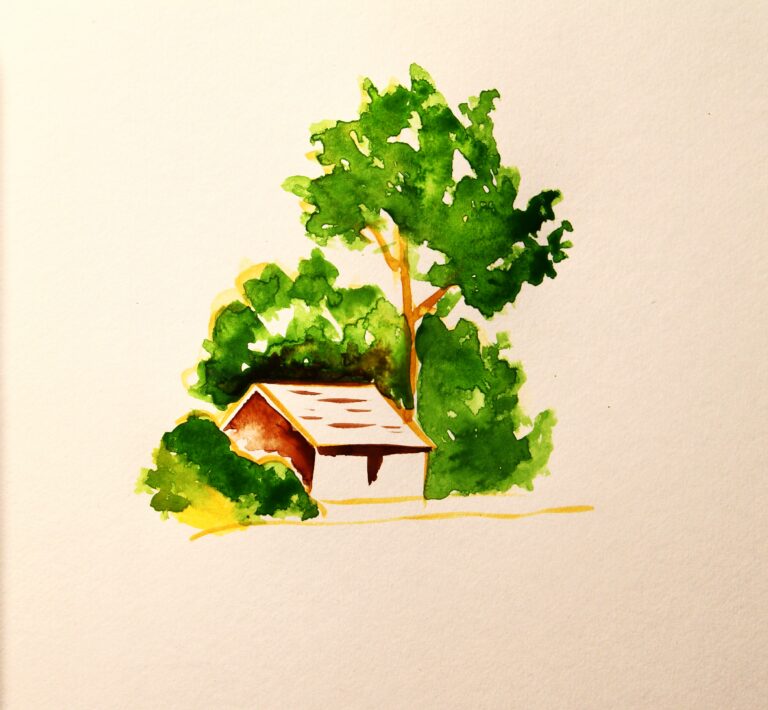
Painting the Hut:
After the blue sky has dried, it’s time to paint the hut. Get a smaller brush and dip it in water. Then, pick a color for the hut, like brown or orange. Carefully apply the chosen color to fill in the hut’s outline. Take your time to make sure the color covers the entire hut shape neatly. The water on the brush helps the paint spread smoothly on the paper. Make sure not to use too much water, so the paint doesn’t become too watery. Once the hut is painted, you can move on to the next steps to add more details.
Painting the Sky:
To color a watercolor blue sky, first, wet the paper with a wet brush. Cover the sky area with the wetness. Then, use light blue paint and make wide horizontal strokes on the damp paper. Let the paint mix and flow naturally. To make the sky more colorful, add a little darker blue at the top. Remember to leave some parts white for clouds. Let it dry without touching it too much, so it stays soft.
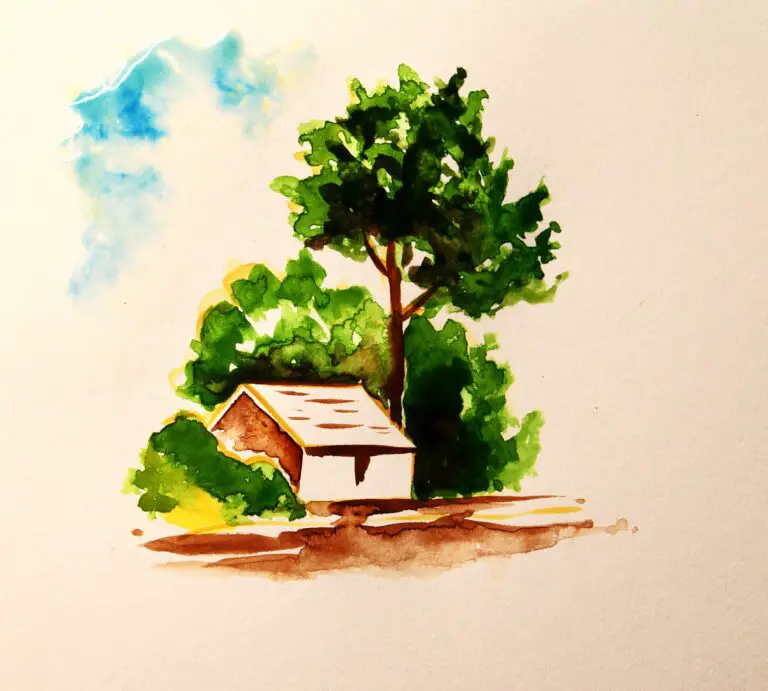
To paint watercolor ground area, start by wetting the area with clean water using a brush. Then, choose earthy colors like browns, yellows, and siennas. Apply these colors to the dampened area using horizontal brush strokes, allowing them to blend naturally. Create variations by adding lighter and darker shades. Leave some white spaces to represent rocks or highlights.
Watercolor painting is a skill that gets better with practice & time , meaning the more you paint, the more your abilities will improve. Keep trying, and you’ll notice progress over time.