
How to draw a Nose (Side View) step by step easy Nose Drawing for beginners.
Welcome to the nose drawing tutorial! Using simple circles as a base , we will create a basic yet realistic nose illustration. Let’s begin with this step by step guide for beginners to draw nose from the side.
Follow this tutorial summed up in three easy steps.
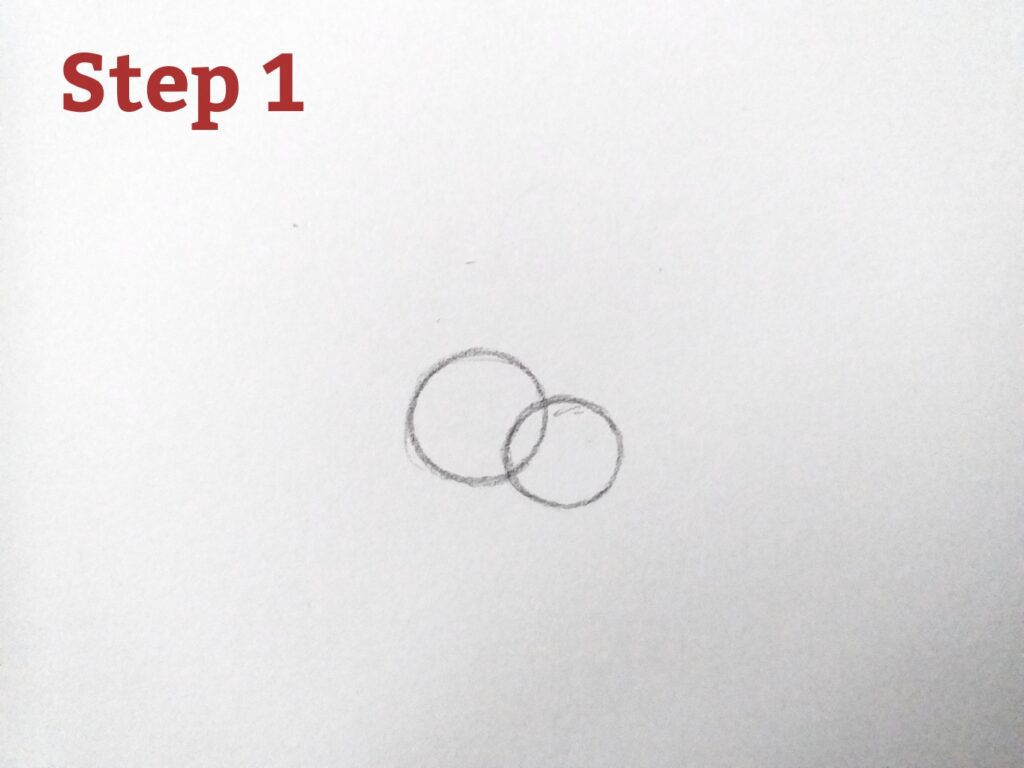
STEP 1 : Draw two small circles overlapping each other as shown in the figure. Right circle is slightly smaller than the left circle. These will serve as the basics to draw the nose.
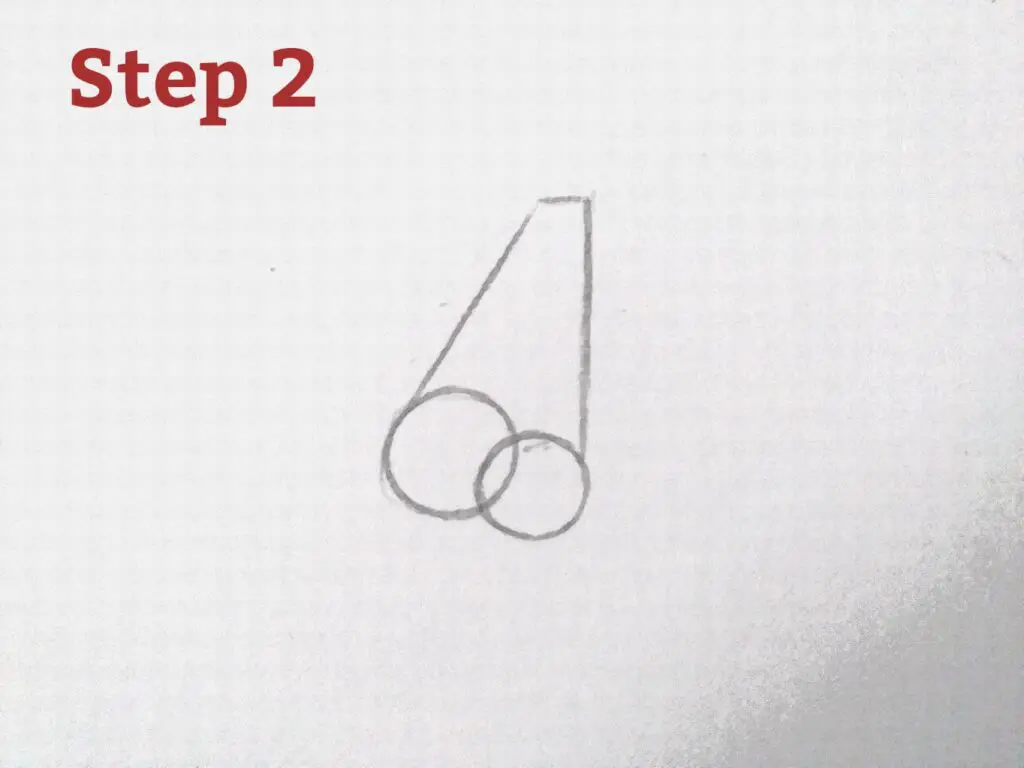
STEP 2 : Draw a slope as shown in the figure to form the tip and bridge of the nose.
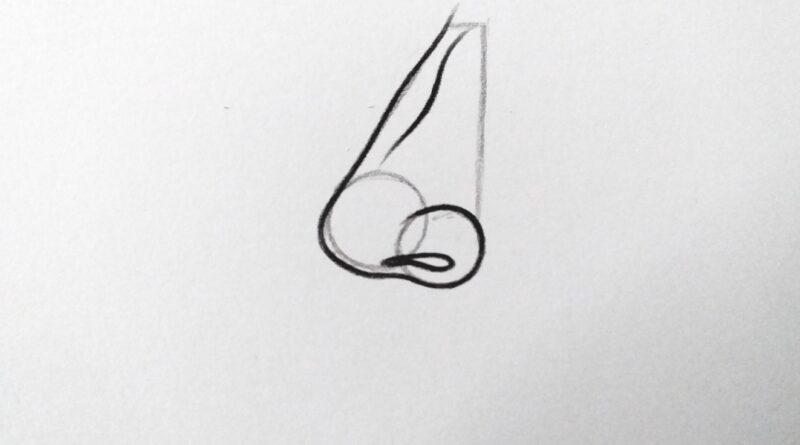
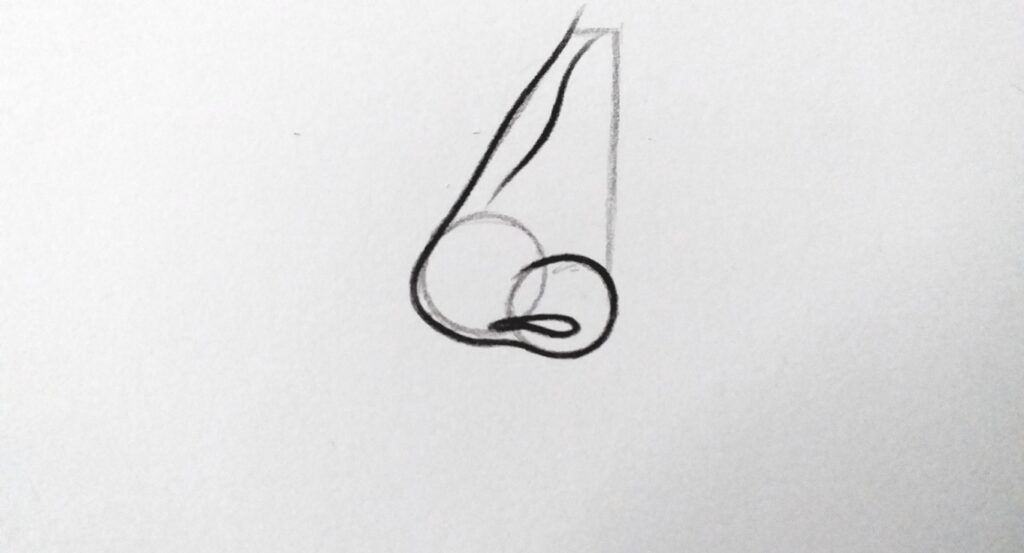
STEP 3 : Now follow the slope and make it little curved from the bridge area. Using soft lines, shape the sides of the triangle to make the nose look more natural. The lines should follow the contours of the nose, leading to the nostrils. more realistic. Add the nostrils between the circles – little looped shape. Within nostril, add a small, curved line to create depth and make the nostrils look more realistic. Erase the basic lines.
Now we have successfully drawn the nose.
Keep in mind, the more you practice drawing noses, the more your ability to capture their special features will improve. As you dedicate time to draw noses repeatedly, you will develop a keen eye for the unique aspects of each nose. With consistent practice, you’ll gain confidence in creating realistic and detailed nose illustrations.