How to draw an Ear step by step | Ear drawing for beginners
How to draw an Ear step by step | Ear drawing for beginners
Welcome to the ear drawing tutorial! In this easy-to-follow guide, we’ll learn how to draw ears step-by-step. Ears may seem challenging, but don’t worry – with practice, you’ll master it. Whether you’re a beginner or an experienced artist, this tutorial will help you create realistic and captivating ear illustrations.
This is a step by step guide on how to draw ears. This will be helpful for beginners to draw ear from the side view.
MATERIALS REQUIRED : HB Graphite pencil for drawing, 2B for shading, Blending stump(optional)
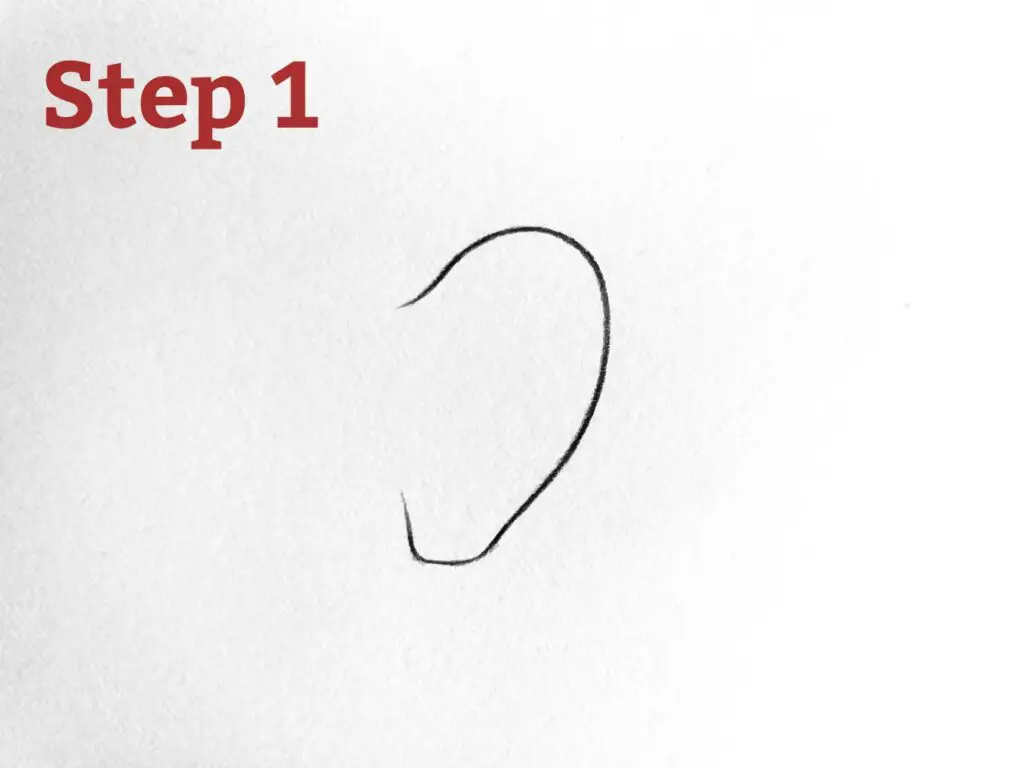
STEP 1 : Outline the shape of the ear as shown in the reference image. Draw a curved vertical line – making bottom of the ear smaller in proportion to the top part of the ear. This will represent the outer edge of the ear.
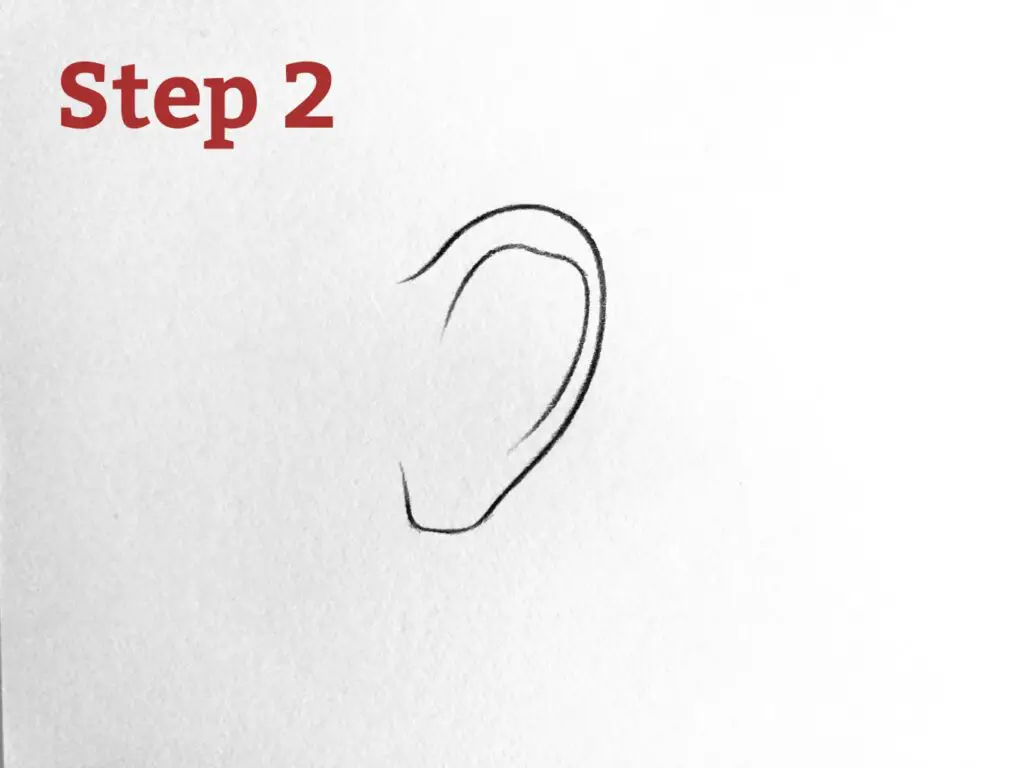
STEP 2 : Draw another curve to indicate folds within the ear. This curve will represent the helix, a curved line that outlines the top part of the ear and the antihelix, another curved line that complements the shape. At the bottom of the ear, draw the earlobe. It usually has a soft, curved shape, but it can vary in size and form.
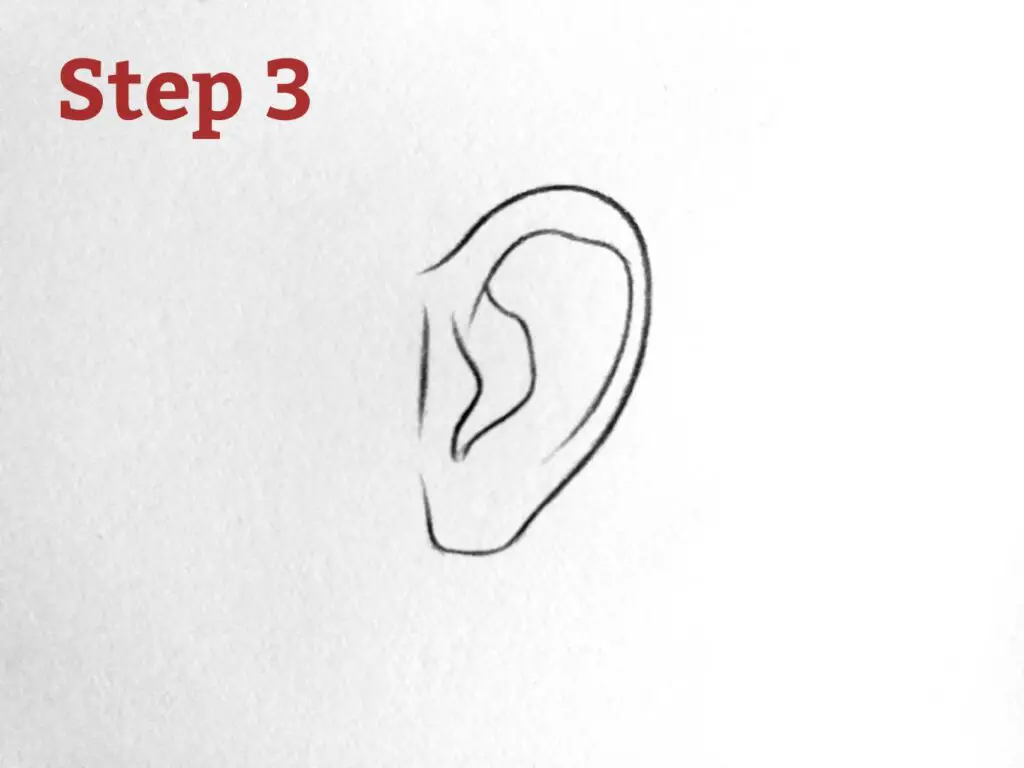
STEP 3 : Now begin drawing the inner part of the ear. Add another curved line near the centre to indicate the tragus and antitragus.
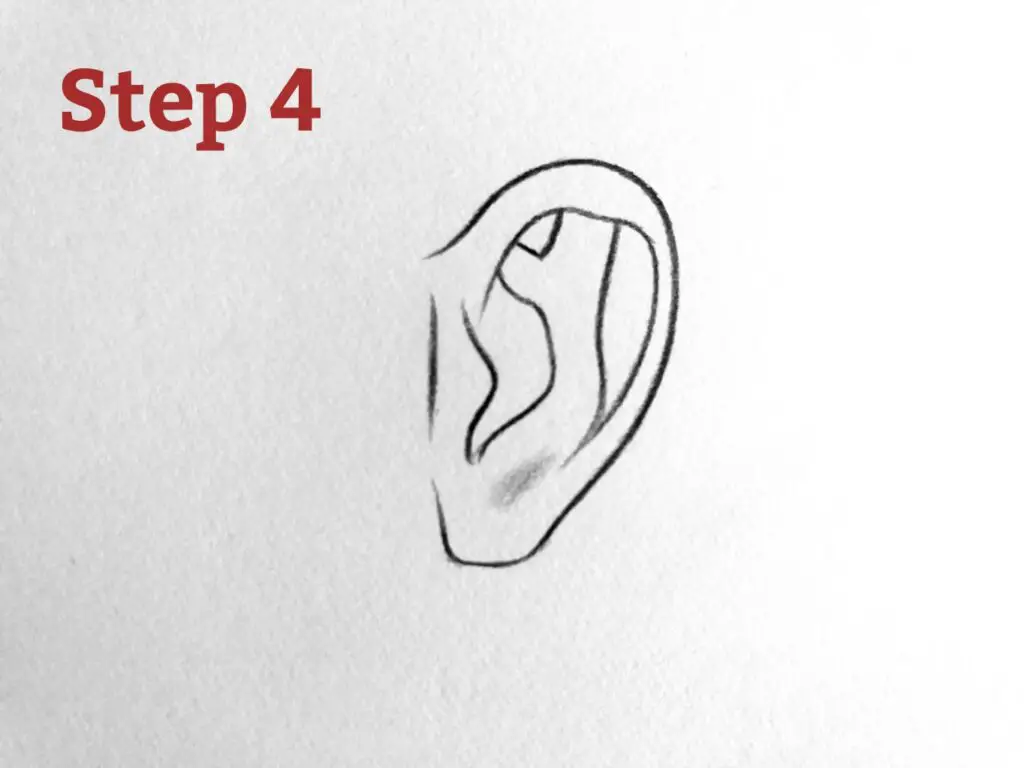
STEP 4 : Add some more lines near the edges of the second curved line the way as shown in the image.
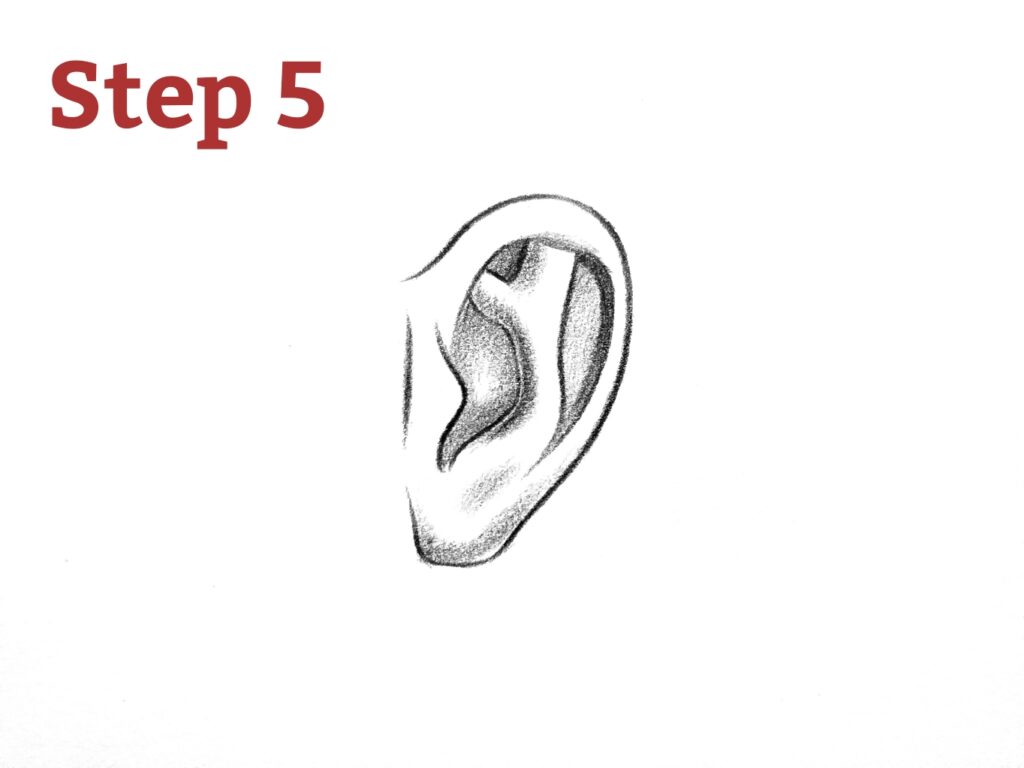
STEP 5 : Draw the Ear Canal & shade the ear which will help to indicate the depth of the ear. Shade deeper parts of the ear darker and bumps lighter. Observe the areas where shadows fall and lightly shade those parts. Pay attention to the curves and details on the ear’s surface.
This finishes the drawing of the ear from the side view.
We have now reached the end of our ear drawing tutorial. We hope you enjoyed following along.