
How to draw Feet/the Human Foot Drawing easy step by step tutorial for beginners
Drawing a human foot can be a bit tricky, but don’t worry this tutorial is here to guide you through it step-by-step. By following these instructions, you’ll be able to draw a basic and lifelike foot illustration. Let’s get started :
Learn to draw Foot with this easy step by step tutorial.
Materials Required : HB Pencil & 2B for drawing details
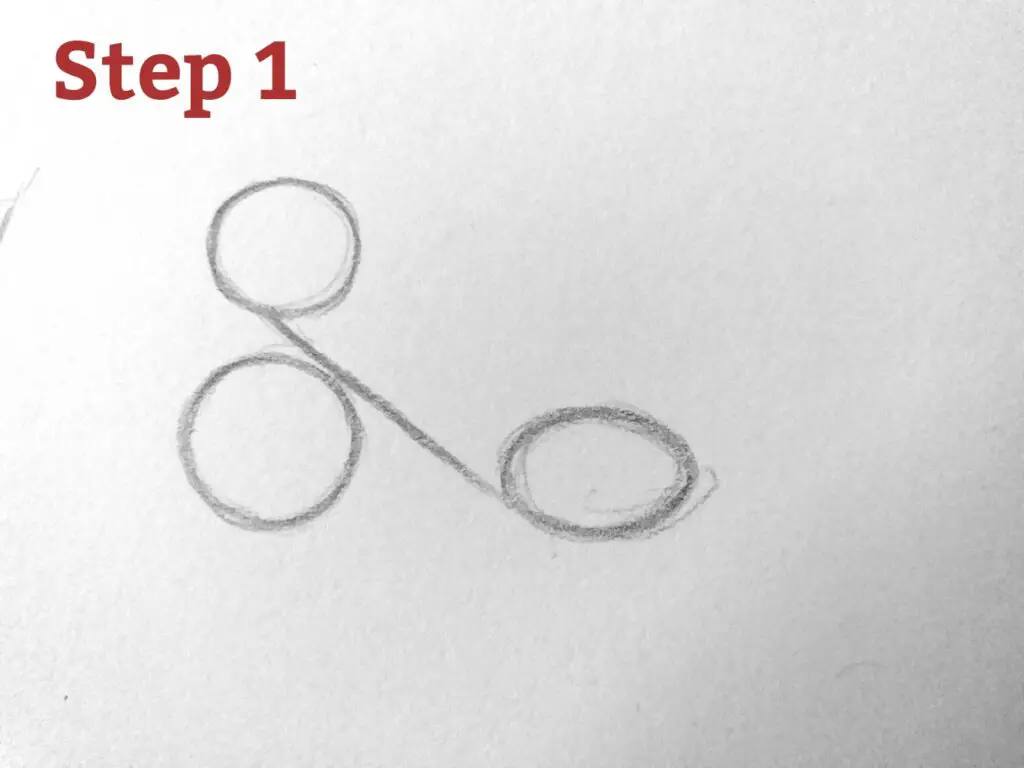
STEP 1 : Draw three circles representing the Heel, Ball and Ankle. Make a diagonal line joining the two circles(Ankle & Ball).
STEP 2 : Now draw the lines touching and joining the basic circles to indicate the outline sketch of the foot area. These will serve as a guide to sketch the foot shape in a better way.

STEP 3 : Following the basic lines, draw a curved line to represent the sole of the foot and upper portion. Now add thumb. You can draw small curved shapes to form toes. Remember to make the big toe the largest and gradually decrease the size for the other toes.
At this point erase the basic lines. Now we have drawn the foot from the side view.

.
To make your drawing more real, you can add shading and texture. Shade the parts where shadows would be, like under the toes and around the arch. Use light shading on the sides of the foot and the heel to create a 3D effect.
Drawing a human foot might appear challenging, especially for beginners, but with dedicated practice and effort, you can achieve excellent and flawless results.