How to draw Objects for Beginners | Object drawing Tutorial step by step
Drawing Objects for Beginners
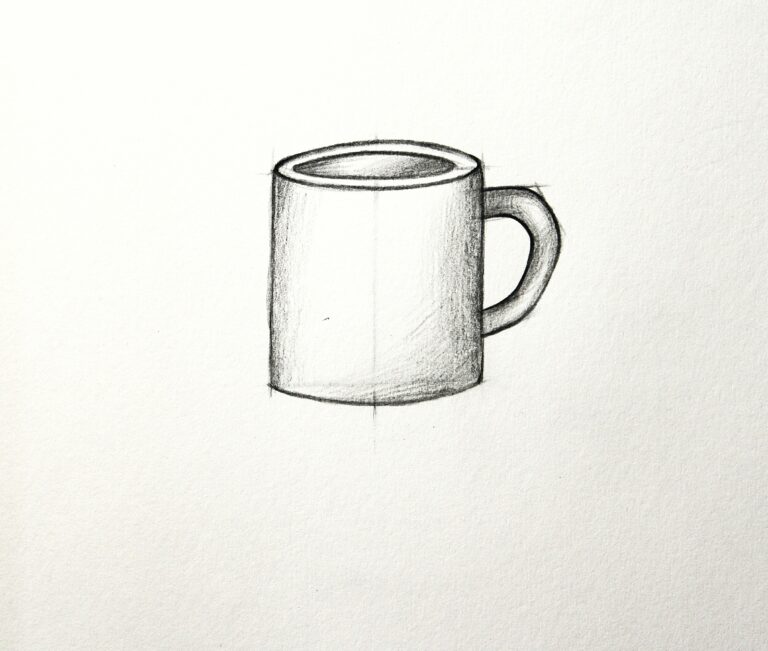
Here’s a step-by-step guide to help you create a mug drawing:
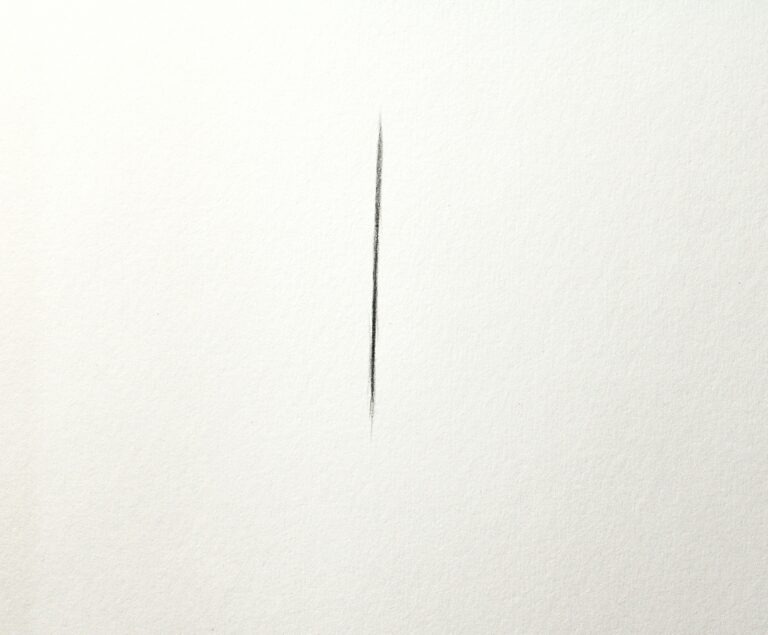
Begin by drawing a vertical line that represents the center of the mug. This line will serve as a guideline for the overall shape.
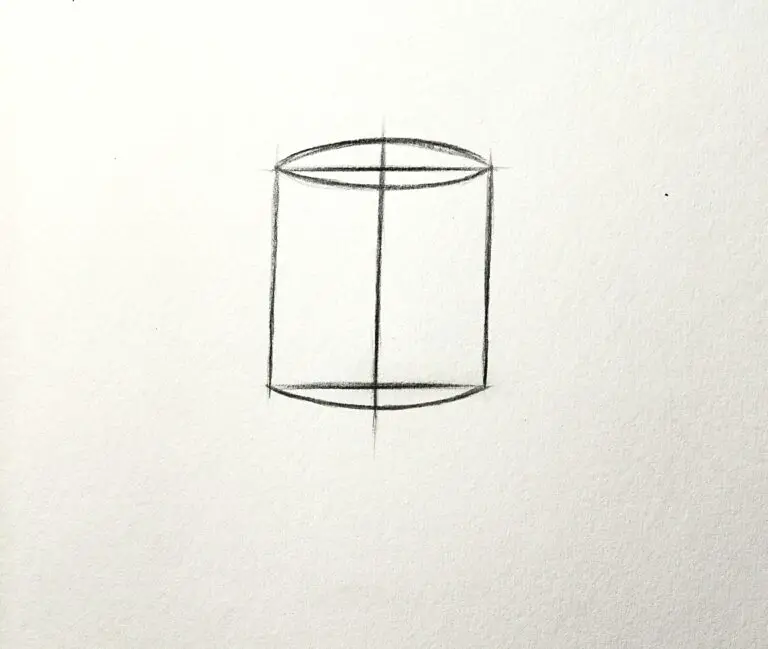
From the top of the vertical line, draw a horizontal line extending to the right. This line will indicate the top edge of the mug.
Draw another horizontal line parallel to the first line. This line will represent the bottom edge of the mug.
Connect the top and bottom horizontal lines with two vertical lines. These lines will complete the basic shape of the mug’s sides.
Add a curved line at the top, connecting the ends of the horizontal lines. This line will create the rim of the mug.
Draw another curved line connecting the edges of vertical lines at the bottom . This will serve as the base of the mug.
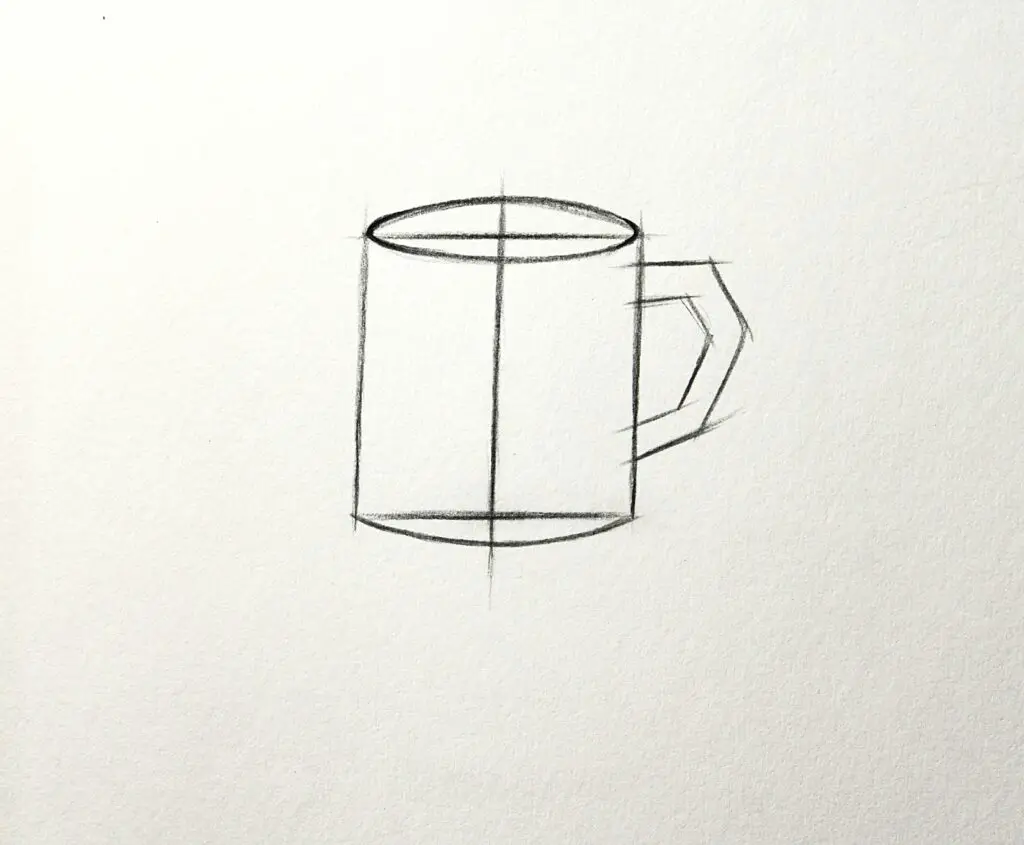
Draw the handle by adding little straight guiding lines as a base to add curves to create a comfortable grip. Ensure that it’s proportionate to the size of the mug and securely attached to the mug’s body.
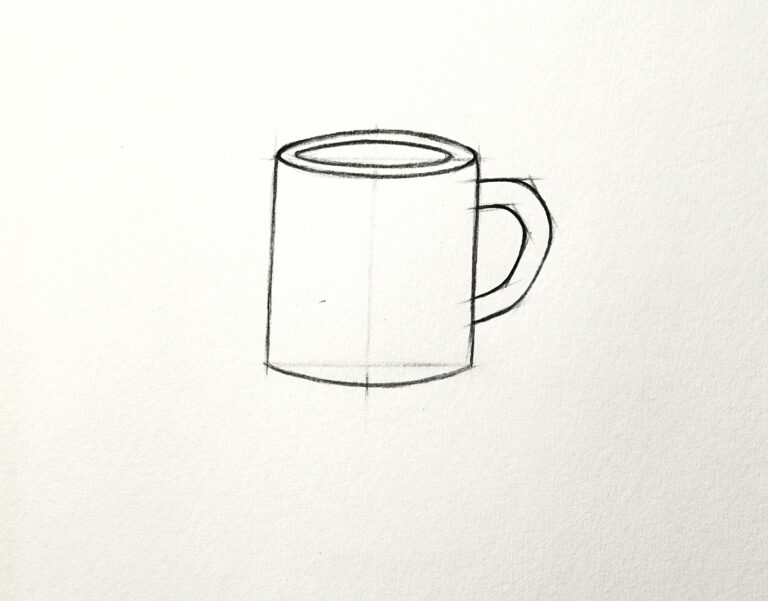
Erase the basic lines at this point and add details to the rim of the mug by drawing a thin line along the top edge.
Add shading to create depth and volume. Observe the light source and determine where the shadows will fall. Use 2B Pencil for shading to gradually darken areas that are in shadow, such as the bottom of the mug and the inner part of the handle.
After finalizing the basic drawing, you can elevate the mug’s visual appeal by incorporating additional elements such as patterns or textures.